Not every visitor wants to message on WhatsApp; some prefer to leave their details and be contacted. The Contact Form module collects these requests inside the widget, drops them into your panel inbox and sends you an email alert. This module is Pro; on the free plan you can see the settings but not publish it.
Module settings
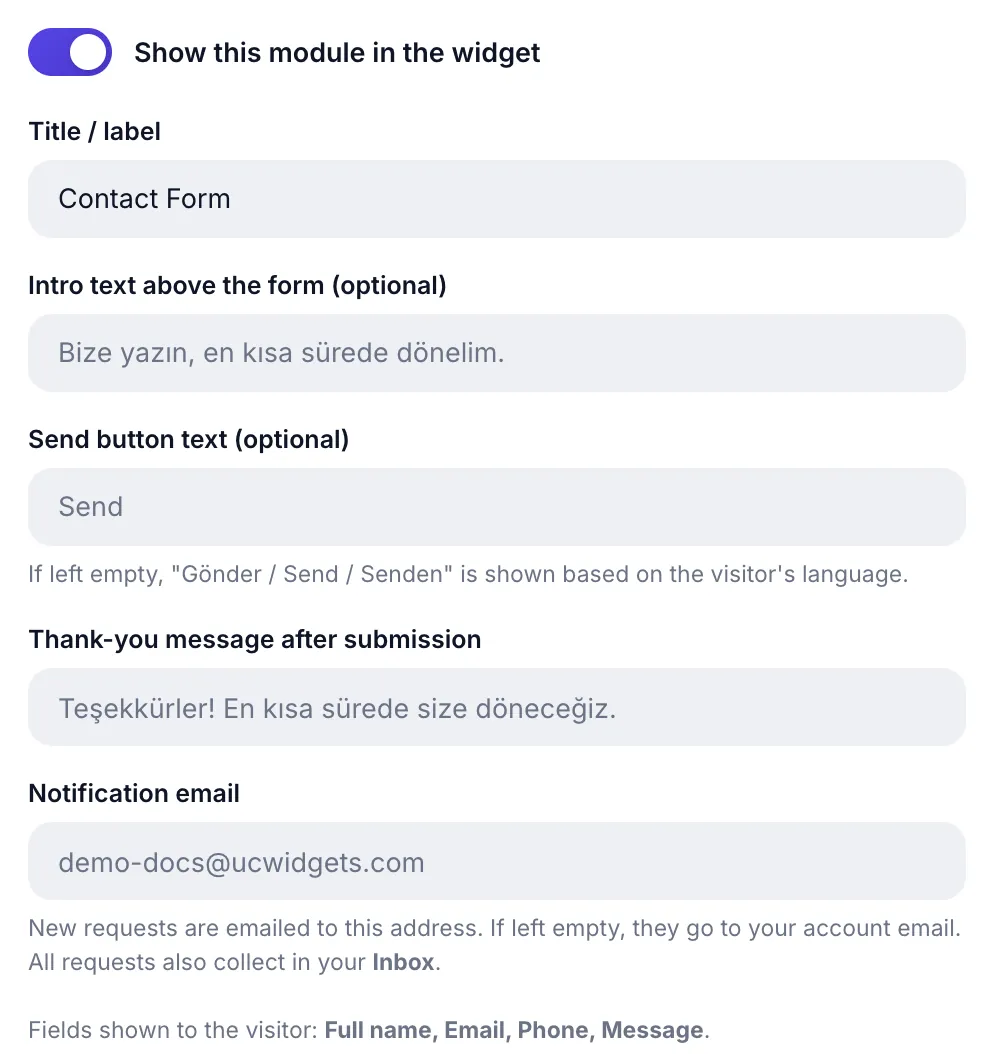
| Field | Limit | What it does |
|---|---|---|
| Intro text above the form | 160 characters | One line at the top: "Write to us, we will get back shortly." |
| Send button label | 30 characters | Left empty it reads "Gönder / Send / Senden" per the visitor's language |
| Thank-you message | 160 characters | The confirmation shown on screen after submitting |
| Notification email | valid address | Where new-request alerts go; empty means your account email |
Fields shown to visitors
The form fields are fixed and not editable from the panel. This is deliberate: the more fields, the lower the completion rate, so the highest-converting four are used.
| Field | Required |
|---|---|
| Full name | Yes |
| Needed to reply | |
| Phone | Needed to reply |
| Message | Yes |
The language of the labels comes from General Settings → Form language: automatic (following your site), Turkish, English or German. To show a flag country picker in the phone field, enable the country code setting in General Settings.
Submission flow
- The visitor fills the form and submits; your thank-you message appears.
- The record lands in the inbox. It is listed with read/unread status on the panel's Inbox page.
- A notification email is sent. You choose the address; if several people follow up, use a shared one (info@, support@).
- You reply from the panel or export the records.
Appearance settings
The Appearance (optional) section at the bottom lets you give this channel its own icon badge style Pro and four colors (icon color, icon background, card background, card text color). Details: the Appearance section.
Tips
- Write the intro as a promise. "Write to us, we reply the same day" gets more submissions than "Write to us".
- State the next step in the thank-you message. "Request received, we will call within 1 business day" sets a clear expectation.
- Check the notification address. A team address instead of your personal email prevents requests slipping through while you are away.
Forms and all Pro modules open for 14 days.
Start FreeAll Pro features free for 14 days; no credit card, live with a single line of code.
Explore UC Action Hub