The WhatsApp module connects visitors to your WhatsApp chat in one tap. A single number is enough for a small business; as you grow you can build a department- or person-based list and measure how many taps each target gets. Open it from UC Action Hub → WhatsApp in the panel.
1. Enabling the module and basic settings
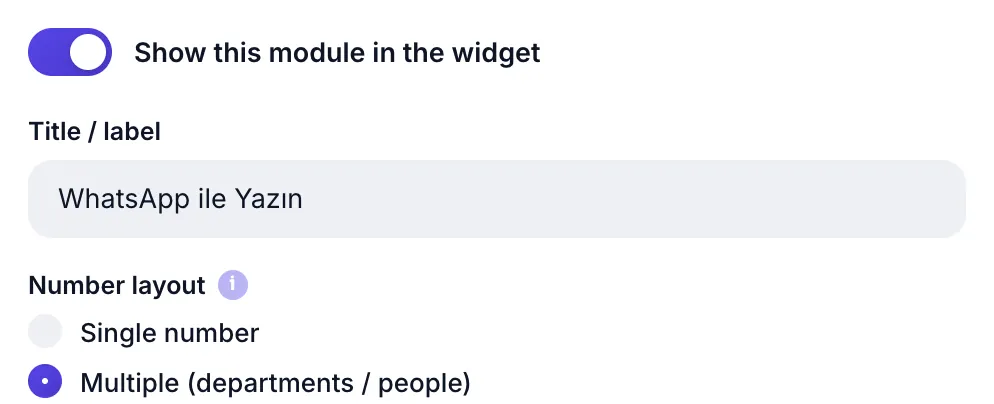
The Show this module in the widget switch publishes the module. When off, your settings are kept but the channel is hidden from visitors.
Title / label is the name of this row in the widget menu. Left empty it reads "WhatsApp". Up to 40 characters.
Number mode defines the module's character:
| Mode | Behavior | Plan |
|---|---|---|
| Single number | All chats go to one number (default) | Free |
| Multiple (departments / people) | The visitor picks from a list; each target's taps are tracked separately | Pro |
In single-number mode
- WhatsApp number (with country code): enter it as
905551112233. Spaces, brackets and dashes are stripped automatically; only digits are stored. - Pre-filled message: the text auto-typed into the visitor's message box when the chat opens (up to 300 characters). Something like "Hello, I would like to book an appointment."
2. Multiple targets: department and person cards Pro
In multi mode the visitor first picks who to message. Each row is a department or person; you can define up to 8 targets.
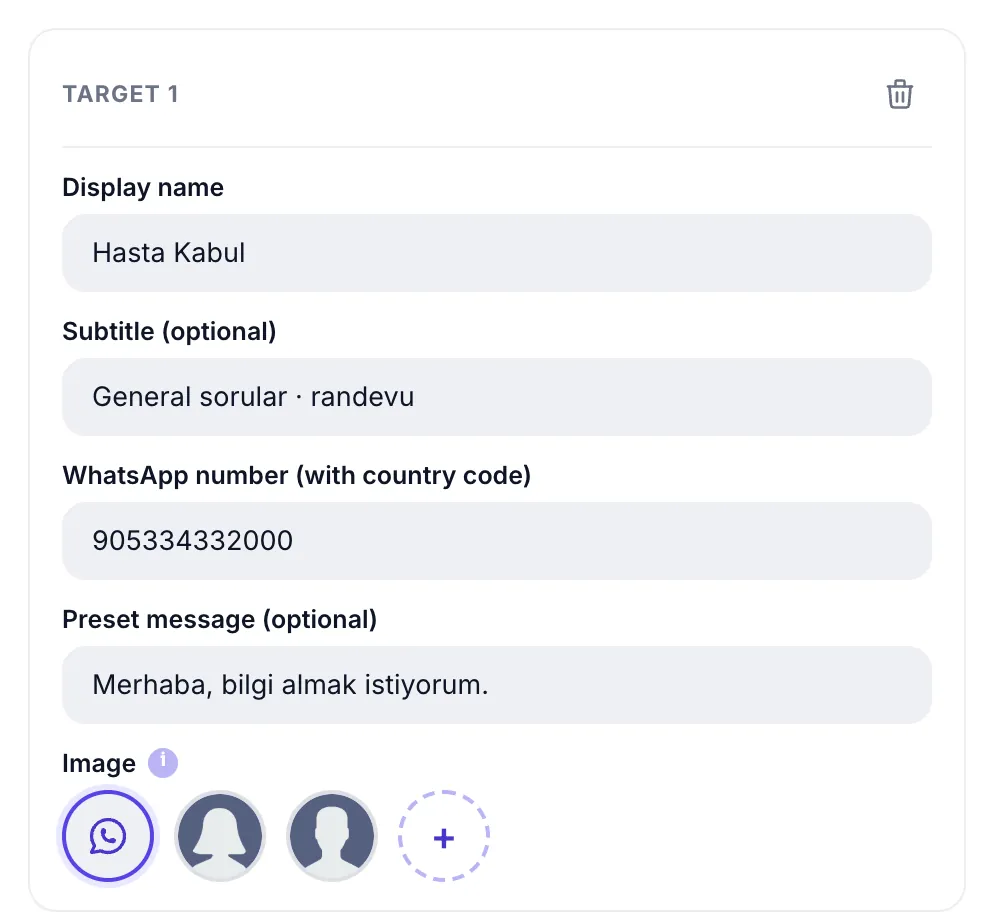
| Field | Limit | What it does |
|---|---|---|
| Display name | 40 characters | The card's title: "Sales", "Reception", "Ms. Kaya" |
| Subtitle | 60 characters | Second line: "Weekdays 09-18", "Dr. Kaya · treatment plan" |
| WhatsApp number | with country code | This target's number; an empty row is not saved |
| Pre-filled message | 200 characters | Target-specific opening message (optional) |
| Image | 4 options | WhatsApp icon · Avatar 1 · Avatar 2 · your own photo |
The Image field sets the circle on the left of the card. Uploading advisor photos gives the list a corporate "meet the team" feel; leaving icons keeps it neutral.
The order of rows matches what visitors see; put the most-used department first. The trash icon on the right deletes a row and + Add Target adds a new one.
How do the stats split?
Each target gets a key derived from its display name. On the statistics page you see taps per target: you can measure which department actually gets demand and which sits idle.
3. Appearance: module-specific colors
Every module has an Appearance (optional) section at the bottom. Left empty, the module uses the widget's general color; here you can give this channel its own identity.
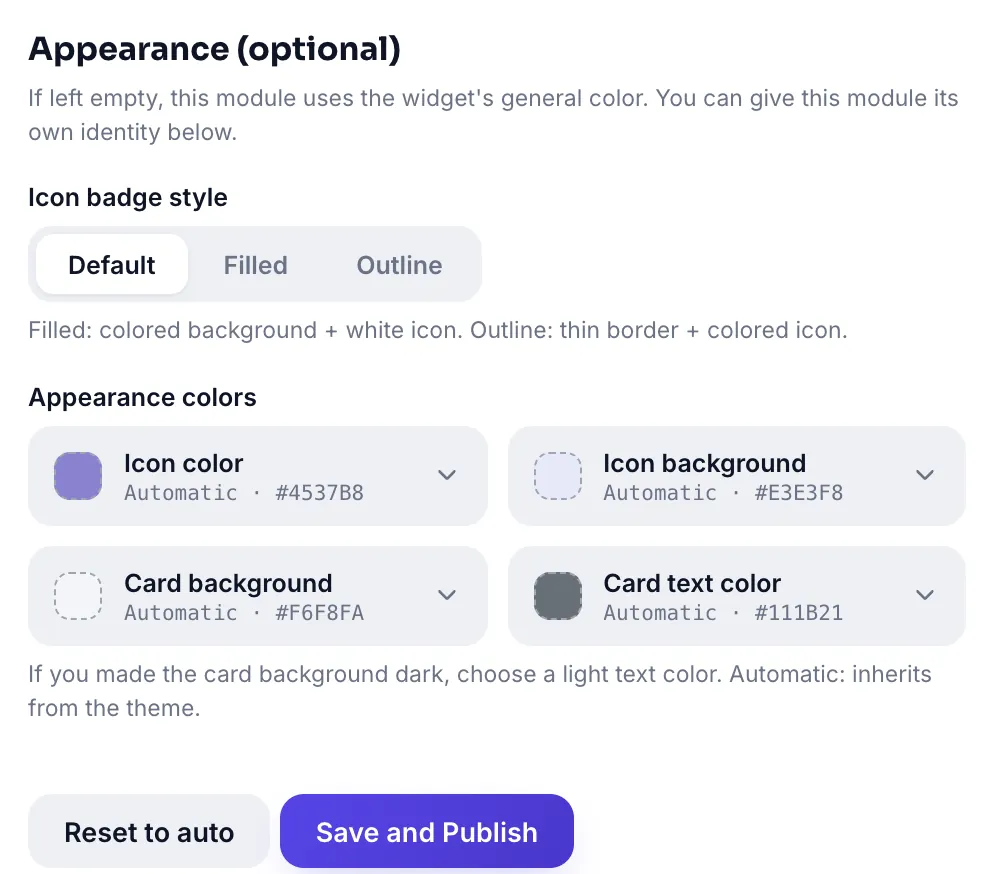
Icon badge style Pro has three options:
| Style | Look |
|---|---|
| Default | Uses the icon style from the widget's general settings |
| Filled | Colored background + white icon |
| Outline | Thin border + colored icon |
Appearance colors are four separate pickers, all set to Automatic by default (inherited from the theme):
| Picker | What it paints |
|---|---|
| Icon color | The channel icon itself |
| Icon background | The circle/square behind the icon |
| Card background | The row's background |
| Card text color | Title and subtitle text |
Each picker offers a 16-color palette, an opacity control and a hex box. Picking a color does not close the popover, so you can fine-tune opacity before leaving.
Practical tips
- Start with a single number. A multi list adds value only when departments are genuinely managed separately; otherwise it adds a pointless choice step.
- Write the pre-filled message to state intent. Instead of "Hello", text like "Hello, I would like pricing for implants" speeds up the first reply.
- Use subtitles for expectation management. A card reading "Weekdays 09-18" saves a night-time visitor from disappointment.
- Prune targets using the stats. Months later, remove the department nobody taps; a short list converts better.
One line of code, live in minutes.
WhatsApp WidgetAll Pro features free for 14 days; no credit card, live with a single line of code.
Explore UC Action Hub